Google Checkout
Google Checkout is Google's simplified take on e-commerce / shopping carts. Using Google Checkout with your site is as simple as making a few changes to your settings in Google Checkout and then dragging an e-commerce element to your page. Note that our Google Checkout integration can only be used with US Currency. If you are not in the US, you should either use our PayPal option or build your product listings directly in Google and then add them to your site using custom HTML elements.
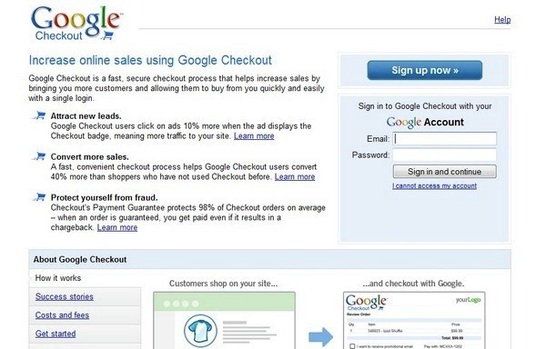
Start by logging into your Google Checkout account (or opening an account if you don't have one).
Start by logging into your Google Checkout account (or opening an account if you don't have one).
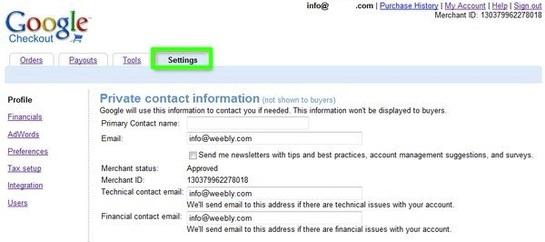
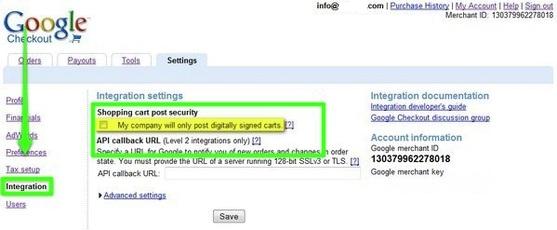
Go to the Settings tab.
Under the "Integration" section, uncheck the "My company will only post digitally signed carts" box and Save.
Note: This checkbox must be unchecked in order to use the Google Checkout shopping cart. Since the information in your shopping carts will not be digitally signed, you should check orders to make sure they contain accurate information, including correct prices, before you ship items.
Note: This checkbox must be unchecked in order to use the Google Checkout shopping cart. Since the information in your shopping carts will not be digitally signed, you should check orders to make sure they contain accurate information, including correct prices, before you ship items.
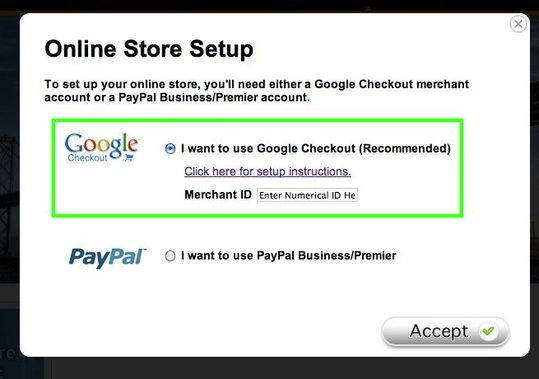
Copy or otherwise make note of your Merchant ID. You'll need it to connect your site to your Google Checkout account.

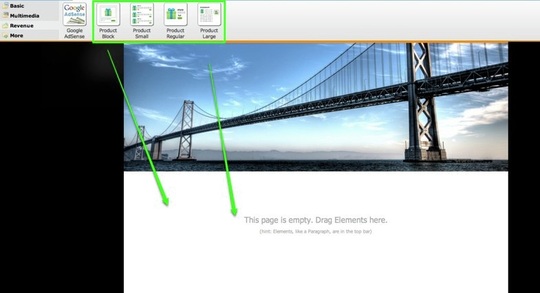
With this done in Google Checkout, you can now drag one of the four e-commerce elements (found under the revenue section) to a page of your site.
The system will prompt you to select either the Google Checkout or PayPal option. Select Google Checkout and enter the Merchant ID number for your account.
Once you've accepted this, you can start adding revenue elements to your site. There are four different kinds.
The Product Block: This is a small, square product element. This is very suitable for creating a grid of products in conjunction with our 2-Column Element.
The Product Block: This is a small, square product element. This is very suitable for creating a grid of products in conjunction with our 2-Column Element.

The Product Small, Regular and Large: These are rectangular elements that are each the same except the Title Fonts and Pricing Fonts are a different size for each. You can see the slight difference between each in the image below.
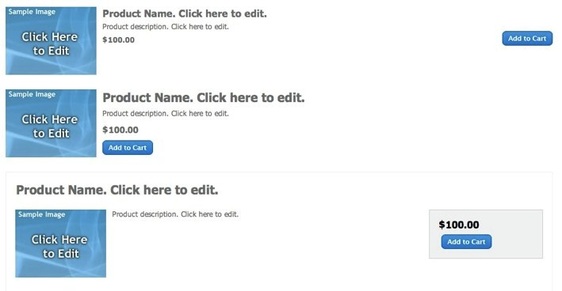
To edit an element, just click the Title area to enter the name, the description area to enter a description, the price area to enter the price and the sample image to upload an image. This works like our other text and image elements.
When you Publish your changes, the Add to Cart button should start working immediately.
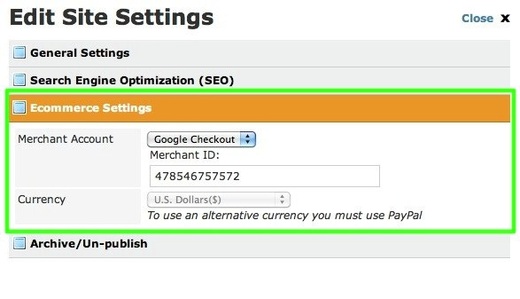
What if you need to change your account Merchant ID used on your site? Go to the Settings tab and select the E-Commerce option. Here you can switch between PayPal and Google Checkout, change your e-commerce account info (if you need to switch to a different PayPal or Google account) and select a different currency using the provided drop-down menu (but only if you're using PayPal).
When you Publish your changes, the Add to Cart button should start working immediately.
What if you need to change your account Merchant ID used on your site? Go to the Settings tab and select the E-Commerce option. Here you can switch between PayPal and Google Checkout, change your e-commerce account info (if you need to switch to a different PayPal or Google account) and select a different currency using the provided drop-down menu (but only if you're using PayPal).